
A Message From the Builder
It is with sincere honour and pride that we congratulate you on the purchase of your new home. The decision to purchase a home is often one of the most important choices of a lifetime. We wanted to take a moment of your time to welcome you to your new Foxwood Home!
Owning a home is something to be proud of, and we take as much pride in our customers’ homes as we do our own. The entire Foxwood Family is here to guide and support you throughout the process. Rest assured that we are building more than a house for you.
Once again, thank you for purchasing a Foxwood Home. We look forward to seeing you as a new neighbour.
Best Wishes,
Foxwood Homes
Emergency
24 Hour Emergency
For emergencies (defined as something that if not attended to immediately, would likely result in an imminent or substantial risk to your home and your safety), Contact below:
The following is considered an emergency:
- Complete loss of heat during the winter months
- Complete loss of electricity
- Complete loss of water or sewage blockage
- Water penetration into the home
- Plumbing leaks
- Safety hazard related to major grading issue
The following item is not considered an emergency:
- Loss of air conditioning
| Regular Hours Emergency Service 8:30am – 5pm, Mon – Fri 519-902-5524 226-559-6586 [email protected] | |
| After Hours Foxwood Homes 226-926-5363 | After Hours Plumbing D&S Plumbing 519-472-7048 |
| After Hours HVAC Select Heating and Cooling 226-232-5559 | After Hours Electric Genuine Electric 519-709-7687 or 519-615-2654 |
What To Do In Case Of An Emergency
- Dial 9-1-1 if your life or the life of another, is in danger.
If your life is not in danger, follow the instructions below. - Immediately call the emergency contact telephone numbers we provided.
- If you are unable to reach our office, or if we do not correct the situation within 24 hours, you should contact TARION at 1-800-668-0124 for further assistance.
- If you cannot reach TARION, or us and have no other option but to have the work completed, you or your contractors should correct the situation. However only the emergency condition (not any consequential damage) should be corrected, and the problem should be documented with pictures, both before and after (if possible).
- You should not repair consequential damage to builder-installed materials. If we are responsible for the emergency item, we will handle any such consequential damage within 30 days of your notice to us and to TARION. If we fail to do so, TARION will work with you directly to settle the matter.
- If the circumstances set out in part 3 above, to recover your costs you will need to submit an “Emergency Form” (available from TARION at 1-800-668-0124 or www.tarion.com) as soon as possible after completing the repair. On the form you must describe the problem in detail aswell as the repair methods used by your contractor. Include any receipts/invoices received for work and materials. You should submit the original to TARION and send a copy to our office.
CUSTOMER CARE
Warranty Coverage
Pre-Delivery Inspection (PDI) and Certificate of Completion & Possession (CCP)
The Builder, prior to closing, arranges a pre-delivery inspection at which you and the Builder’s representative will be present. The purpose of this inspection affords you the opportunity of identifying any items of construction that you consider defective, sub-
standard or unacceptable within the parameters of the Act. This process should take one and a half to two hours. Our representative will advise and clarify any areas of doubt with respect to TARION requirements.
Any deficient items and items requiring completion are noted on the PDI Form used in conjunction with the Certificate of Completion and Possession (CCP). You and the Builder’s representative then sign this CCP and PDI forms.
Please note: there will be no children under the age of 18, any third-party home inspector, or any real estate agents allowed at the time of inspection. The inspection will only be conducted with the people who are on the title for the property.
Warranty Service Requests in Accordance to TARION
As specified in the Agreement of Purchase and Sale, we as the builder, warrant your home during the first year of possession from defective materials, sub-standard workmanship, Ontario Building Code violations and major structural defects. Ingress of water and mechanical equipment is guaranteed for two (2) years and TARION covers major structural defects for a total of seven (7).
Warranty Checkpoints
*Please note this information is referenced from the TARION warranty website: www.TARION.ca

TARION Warranty Requests- First Year
During the first year of possession of your home, you will have TWO opportunities to report warranty items covered by TARION. It is essential that you use the standard forms (available from TARION) and submit them when necessary to TARION. Follow the instructions on the forms to ensure that your forms are complete and are submitted on time.
30-Day Form (Providedwith your Homeowner Information Package)
We recommend that you fill out and submit the 30-Day Form on or about the 25th day after your date of possession. If you do not submit a 30-Day Form on time, you will have to wait until the final 30 days of the first year of possession to make a warranty service request on the Year-End Form.
Year-End Form
The 30-Day form is intended to catch most warranty items, however, it takes several months for the natural materials in a new home to dry and settle. New one year warranty items may emerge. At any time within the last 30 days before the expiry of year one of your warranty, you may submit a Year- End form listing any new or outstanding items. Only forms submitted on time will be accepted.
*Please note this information is referenced from the TARION warranty website: www.TARION.ca
Tarion Warranty – First Year Coverage
Tarion requires the home to be:
- Constructed in a workmanlike manner and free from defects in material.
- Fit for habitation.
- Constructed in accordance with the Ontario Building Code.
- Free of major structural defects.
We recommend you keep a running list of items for your year end form to help keep track of your concerns

*Please note this information is referenced from the TARION warranty website: www.TARION.ca
Tarion Warranty – Second Year Coverage
The Two Year Warranty provides coverage for the following defects, for a period of two years from the date of possession.
- Water penetration through the basement or foundation walls;
- Defects in our materials or work (caulking, windows, doors, etc.) resulting in water penetration into the building envelope
- Defects in materials or work in the electrical, plumbing and heating delivery and distribution systems

- Defects in our materials or work which result in the detachment, displacement or deterioration of exterior cladding (such as brickwork, aluminum or vinyl siding);
- Major structural defects
- Violations of the Ontario Building Code’s health and safety provisions
*Please note this information is referenced from the TARION warranty website: www.TARION.ca
Tarion Warranty – Seven Year Major Structural Coverage
A major structural defect isdefined by the TARIONWARRANTY CORPORATION as:
- Any defect in materials or work that results in the failure of a load-bearing part of the home’s structure or materially and adversely affects its load- bearing function
- Any defect in materials or work that significantly and adversely affects the use of the building as a home
*Please note this information is referenced from the TARION warranty website: www.TARION.ca
All forms can be obtained from Tarion by visiting:
https://www.tarion.com/resources/Pages/Statutory-Warranty-and-
Related-Tarion-Forms.aspx
or by calling 1-800-668-0124

Register into the TARION MyHome system
NOTE: All forms must be submitted in sequential order
Take advantage of all the benefits of MyHome:
- Manage all of your warranty information in one place
- Submit warranty forms online
- Receive e-mail alerts for important warranty deadlines
- Receive e-correspondence from Tarion instead of paper
*Please note this information is referenced from the TARION warranty website: www.TARION.ca
Tarion Warranty Exceptions
Similar to any type of Warranty, there are exceptions or limits to the extent of your coverage. For this reason, the following outlines what are considered to be non-warrantable items or actions adversely affecting the warranty:
- No repair or replacement for which the Builder is liable, pursuant to their warranty, shall be undertaken by the Owner without first obtaining the express written consent of the Builder. If such a repair or replacement is made without first obtaining such consent, the Builder shall be fully relieved and discharged from all of its obligations and warranties to the Owner with respect to such repair or replacement.
- When you examine your home during the pre-closing inspection, certain deficiencies may be visible and you are expected to make careful note of these items for rectification. Those items will generally be our responsibility to correct. In the days following your occupancy of the home, it is not uncommon for considerable minor damage to occur as a result of the move-in process. Movers often bang furniture, appliances and cartons into walls, doors and cabinets, causing surface damage. It is often the case that ceramic tiles are cracked or scratched by heavy items being dropped on them.
Many times this will not be noted by the homeowner until some considerable time later. For all of these reasons, we can only accept responsibility for damage of a surface nature to those items (I.E.: TILES, TUBS, FLOORS, SINKS, CABINETS, COUNTERTOPS, CARPET OR VINYL) identified within your Certificate of Completion and Possession
The following occurrences are not covered by the Tarion Warranty Corporation, nor are we responsible for such occurrences:
Caused by a Third Party:
- Damage or destruction occasioned by fire, wind, rain, hail, freezing, lightning, insects, acts of God or other acts not reasonably within the control of the Builder
- “Winterkill” in lawns.
- Installation of Air Conditioners, air filters, humidifiers, etc. by any contractor other than the original heating sub-contractor can void the warranty on your mechanical system.
- Damage due to installation of roof television antenna or satellite dishes.
Normal Wear and Tear:
- Defects arising from condensation, contraction, expansion, and other occurrences, common to the type and grade of material employed, provided that such material is of a grade generally acceptable within the building trade.
- Normal weathering of exterior finishes.
- Minor surface cracks in concrete walls, floors and porches.
- Settlement of exterior wear and tear after initial repair
- Surface pitting, superficial cracking and marbleizing in concrete, unless due to the use of material not in conformance with acceptable standards.
Deficiencies due to Homeowners Actions:
- Damage of plumbing fixtures due to abrasive cleaner or careless use.
- Plumbing blockages other than those caused by construction debris.
- Damage to concrete, slabs, walls and garage floors caused by salt or calcium products.
- Damage to driveways caused by heavy or sharp objects.
- Damage to driveways caused by petroleum products.
Other:
- Any machinery, equipment, fittings, installation, e.g. furnace, water heater, sealed window, appliances, electrical or mechanical installation, which at the time of delivery of the home are subject of a warranty or guarantee given by the manufacturer or supplier thereof; regardless of the term of, or any conditions limiting such guarantee.
- Minor drafts at door and window openings, and at electrical outlets.
- Locating survey monuments and boundary lines.
- Death of a tree, which existed before construction of the house.
- Depressions of less than six inches, unevenness, flaking of surface stones, or checking/ cracking at the edges of asphalt driveways
- Efflorescence (white powder) on concrete and brick walls.
- Sanding, painting, wall papering or refinishing of any drywall repairs.
- Minor tool marks and blemishes in trim and other millwork surfaces.
- Variations in colour and shading on cabinets, panels, trim, wood flooring, pickets and handrails.
- Replacement of faucet washers and “O” rings.
- Exact colour match of any replacement material.
- Consequential damages caused by any defect covered by this warranty.
Types of Warranties
Your home warranty policy is only the beginning of your coverage. Once their warranty period is over, many of the items in your home may be covered by manufacturer, supplier, or installer warranties. To maximize the benefits you will receive through these additional warranty programs it is important that you understand what a warranty is, how the types of warranties differ in coverage and the terms laid out for each of the components in your home.
“A warranty is the manufacturer/supplier/installer promise to back their product/service.”
How Do Warranties Differ?
1. Full Warranty
If your warranty states that it is a full warranty, you can generally assume that the defective product will be fixed or replaced at no charge. Most often this includes removal and reinstallation of the product if required. If after successive attempts the faulty product cannot be repaired, you get a new product, a credit or your money back. You should not have to do anything unreasonable to obtain warranty service, such as sending your built-in dishwasher to the supplier in its original packaging.
The warranty may be in effect throughout the entire term of its coverage, regardless of whether or not the product changes hands to a new owner.
Please note: A full warranty may not cover the entire item; it may only cover certain components of the product or certain internal parts. Read your manufacturer’s information.
2. Company Letter of Guarantee
Sometimes a manufacturer may not offer a hardcopy warranty card, but instead provide a “Letter of Guarantee”. This is a signed document, usually on company letterhead, that states how the company will help if you encounter a problem with their product.
A “Company Letter of Guarantee” is generally very short and to the point, but it is specific with regards to how a problem will be addressed.
3. Implied Warranty
If your product does not come with an expressed written warranty, you still have coverage in the form of an implied warranty, unless the product is marked “as is”. These are consumer rights created by law, not by the manufacturer. There are basically two
types of implied warranty. The most common type, known as a “warranty of merchantability” essentially means that the vendor promises that the product will do what it is supposed to do. For example, a coffee maker will make coffee, and a furnace will produce heat. The other common type of implied warranty is the “warranty of fitness” for a particular purpose. This means that you have purchased the product on the seller’s advice that it is suitable for a particular use.
For example, if a vendor suggests that you buy a certain sleeping bag for -10°C weather, he warrants that the sleeping bag will be suitable in -10°C weather. Abuse, misuse, improper maintenance and ordinary wear are not covered under an implied warranty.
If you purchase a product without a warranty, it may indicate that the item is risky (either low quality, discontinued or damaged) and therefore should be available at a reduced price.
4. Spoken Warranty
A spoken warranty is a verbal promise that should not be considered as coverage. Sales people will sometimes make an oral promise towards their product, but it is often difficult to prove in court that the promise was made. Therefore, have the sales person put their promises in writing. If they are sincere in their statements, they will not object to your request.
5. Extended Warranty
A warranty by itself is included in the purchase price of the product and an extended warranty is usually purchased separately. Quite often an extended warranty will be purchased through a third party.
If you are thinking of purchasing an extended warranty you should consider these points:
- Does your present warranty already cover the repairs you would get through the extended warranty?
- How much longer will the extended warranty go on after your existing warranty has expired?
- Does the extended warranty provider have a good reputation and a solid track record?
An extended warranty may cover only certain parts or specific repairs to a product, so read the fine print. If it does not specifically state that a certain item is covered you should assume that it is not.
There are sometimes certain clauses that require you to take specific action to fulfill your end of the contract, such as contacting the company as soon as a problem begins to surface. There may be some costs involved even after you have paid for your extended warranty. Some contracts require you to pay a deductible, or even a cancellation fee, if you decide to get out of the program. If you feel that the product is most likely to outlive the length of the extended warranty, or any repair costs would be minimal, you probably don’t need an extended warranty.
Avoiding Problems
Take the following precautions to avoid problems in having warranty issues addressed:
- Know exactly what the warranty does and does not do. Are you expected to pay labour costs or any other expenses to have issues addressed?
- Find out specifically what the warranty provider will do if a product fails. Will they replace it, repair it, or return your money?
- Be sure to maintain and use the product only as directed by the provider.
- Will the company cover any “consequential damages”? For example, if your freezer quits operating, will you be reimbursed for the loss of food?
- Finally, read and understand your warranty information and you should not encounter any surprises.
How To Determine If An Item Is Covered
Homeowners who are in doubt as to whether an item is covered by the warranty should consult the Construction Performance Guidelines, which describe many of the most commonly reported warranty service requests and indicate which are covered by the warranty.
How To Request Warranty Service
The simplest and most convenient way to submit warranty forms is through the homeowner portal at:
MYHOME.TARION.COM
You may also send Statutory Warranty Forms to Tarion’s office via courier, or mail, or email them to:
Upon receipt of a Statutory Warranty Form, Tarion will send you a notice acknowledging the receipt of your form, indicating whether or not it is on time.
If you do not receive confirmation within 10 days of submitting your form, contact Tarion. If a form is sent by regular or registered mail, submission is effective on the postmark date. Forms sent by regular mail must be received by us on or before 10 days after the submission expiry date for that particular form.
If a form is sent by registered mail and the postmark is missing or illegible, the date on the receipt given to you by the Post Office will be used. Submission by regular or registered mail is not advisable during a general interruption of postal service (during a labour dispute, for example). A copy of each form you submit to Tarion should also be sent to your builder so they can repair or otherwise resolve the item.
HOMEOWNER MAINTENANCE
Maintenance of the home is your responsibility.
All homes require periodic maintenance to prevent premature deterioration and to ensure proper functioning and systems integrity. In addition to this homeowner guide, we have provided you with access toandhave made available to you written warranties on consumer products which may be installed in your home.
Please familiarize yourself with these documents, as we are not responsible for maintenance issues related to your home, or for damage that results from your failure to maintain your home. This maintenance guide covers general maintenance and care required for items and fixtures in your home. It is by no means an all-inclusive list and may not apply to all items in your home.
For full maintenance details, please consult all guides, manuals, warranties, and literature provided by the manufacturer which may be found in your Homeowner portal or on the manufacturer’s web site.


Maintenance Guide & Tips
Important Note:
Improper maintenance on yourhome will void warrantiescovered by Foxwood Homes and TARION.
Humidity Control
Today’s energy-efficient homes are built tightly to seal out the cold weather in winter and keep in the air conditioning in summer. Because of this, it is possible that a new home can be severely damaged by lack of ventilation or by excess moisture. It is important to remember that moisture damage caused by improper or inadequate use of your ventilation system, is not covered by the new home warranty.
Q. What causes moisture damage?
- Your home can be damaged if weather-related water is allowed to enter and remain in the structure.
- Water from leaking pipes or fixtures that is not immediately cleaned up, and indoor humidity levels that are not properly controlled, can have serious consequences. Sometimes this damage is easily seen, at other times the damage is hidden inside wall and roof spaces. Regardless of where it occurs, moisture damage can lead to serious problems, such as rot, mould, and even structural failure.
Q. How can I control moisture?
- Always use your home ventilation system to control moisture.
- In a typical home, over 20 litres of water are added to the indoor environment every day. That’s 7,300 litres in a year, enough to fill a medium-sized swimming pool. Bathroom fans, kitchen range hoods and packaged ventilators such as heat-recovery ventilators are specifically installed in your home to help you control moisture and contaminants.
- Regular use of your home ventilation system will exhaust excess airborne moisture caused by bathing, showering, doing laundry and cooking.
Q. What else can I do to control moisture?
Here are some extra tips you can follow to help prevent moisture damage to your home.
A. Inside the home.
- In the winter, keep the relative humidity in your home in the range of 30-45%. Lower humidity levels may affect your health and cause things made of wood to shrink. Excess humidity can cause condensation on windows and damage the surrounding wall. When using a humidifier, follow the manufacturer’s instructions.
- In the summer, dehumidify the basement to avoid condensation buildup on the cool foundation walls. Relative humidity levels should not exceed 60%.
- Repair leaky pipes and fixtures immediately. Clean and completely dry any areas that are dampened or wet within 48 hours.
- Store organic materials such as newspapers and clothes away from cool, damp areas. Keep storage areas tidy so that air circulates freely.
- Purchase a “hygrometer” to monitor the relative humidity in your home.
- If you are adding a hot tub to your home, or have a large collection of plants, consider the amount of moisture they will add to your indoor air and ventilate accordingly.
- Never vent your clothes dryer inside your home. If you have a gas- or propane-fired dryer you may also be venting carbon monoxide inside your home!
- Investigate and identify any musty smells and odours. They are often an indicator that there is a hidden moisture problem.
2. Outside the home.
- Keep flowerbeds or landscaping at least six inches or 150 mm away from the top of the foundation. Placing soil near or above the top of the foundation allows moisture to come into direct contact with the structure of the building.
- Ensure that land adjacent to the foundation slopes away from the home so that rainwater and snow melt will run away from the foundation.
- Clear eavestroughs of debris regularly and extend downspouts so that water is directed away from the building. Water flow can erode the ground near the foundation and create depressions where water collects. Standing water near the foundation can force its way into the basement.
- Fix the caulking around windows and doors and on the roof if it becomes cracked or separated.
- Have your roof inspected regularly to ensure shingles, flashing and chimney caps are in place and sealed properly.
Electrical Systems
The electrical system in your home is intended for normal residential use. We highlight recommend that you consult a licensed electrician to make changes or additions to your electrical system.
AFCI (Arc Fault Circuit Interrupters)
Similar to GFCI’s, Arc Fault Circuit Interrupters are sensitive to power surges caused by electrical arcing. Arcing can occur when wires or cords are damaged, and the resulting heat can cause a fire. As with GFCI’s, AFCI circuits have TEST and RESET buttons and should be tested monthly. If an AFCI breaker trips, unplug the affected appliance or device and reset the breaker at the electrical panel. If the same circuit trips again, it may indicate a damaged electrical cord.
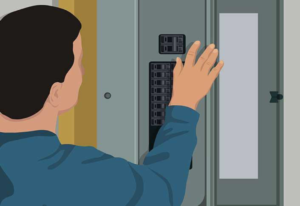
Circuit Breaker
During your orientation walk-through your builder will have pointed out the location of the circuit breaker panel. There will be one master circuit breaker and several individual circuit breakers.
Q: My circuit breaker tripped, what do I do?
- Circuit breakers trip under excessive electrical load.
- Circuit breakers have three positions: ON, OFF, and TRIPPED.
- When a circuit breaker trips it must first be turned OFF before it can be turned ON. Switching the breaker directly from TRIPPED to ON will not restore service.
- Reset tripped circuit breakers by moving them to the OFF position and then to the ON position.
In the event of a loss of electrical power in one area of your home, follow these steps:
- If the power loss is in one area of your home and power is available in other areas of your home, it is likely that an individual circuit breaker has turned off.
- Unplug any appliances in the area that are without power and turn other appliances off. Check the circuit breaker and, if necessary, reset it.
- Plug your appliances back in. If the circuit breaker fails repeatedly, you either have a short circuit in one of your appliances or a short circuit in the electrical system of your home.
DO NOT ATTEMPT FURTHER REPAIR.
CALL A LICENSED ELECTRICIAN.
If electrical power is lost throughout your home:
- Check the master circuit breaker. If the master circuit breaker has tripped, reset it.
- If the master circuit breaker trips repeatedly, refer the problem to a licensed electrician.
- If the master circuit breaker has not tripped, take a look around your neighbourhood.
- If you notice a general electrical failure in your neighbourhood, call your electric company to report the problem.
GFCI (Ground Fault Circuit Interrupters)
During your orientation walk through your builder will have pointed out the location of ground fault circuit interrupt devices (GFCI outlets).
Usually, GFCI outlets are located in:
- bathrooms near tubs and bathroom sinks
- kitchens
- laundry rooms
- garages
- exterior of your home.
These are special circuit breakers that are designed to break the flow of electricity in the event of a short circuit. This will prevent dangerous electrical shock.
Maintenance Tips
GFCI circuits have a TEST and RESET button. These are pointed out during the orientation walk through.
- Once each month the TEST button should be pressed. This will trip the circuit.
- To return service, press the RESET button.
- If a GFCI breaker trips during normal use it may be an indication of a faulty appliance and some investigation is in order.
- Do not plug appliances such as air conditioners, refrigerators, and food freezers into GFCI outlets.
- The electrical surge that occurs when these appliances cycle will trip the GFCI outlets and break the circuit. Heavy electrical usage appliances such as power tools or even hair dryers can trip the GFCI breaker. Atmospheric moisture, such as during rains or after a hot shower, may also trip the GFCI breaker.
- It is possible that some outlets that are connected to the GFCI device are not so marked. If you have a failure at an outlet, reset the GFCI devices as well as the circuit breaker.
Continued failures indicate a potentially dangerous electrical problem.
Contact a licensed electrician for assistance.
Interior Lighting
The lighting fixtures in your home are designed for standard wattage bulbs.
Q: How can I preserve the usage of my bulbs?
- To avoid excessive heat, you should not exceed the manufacturer’s recommendations.
- If a luminous light fixture does not work, make sure all fluorescent bulbs are installed properly.
- Adjust any tubes that are flickering or buzzing.
- Check wall switches and circuit breakers.
- If a light fails to come on, check the bulbs to be sure they are not loose or burned out. Also, check to see that they are the correct wattage for the fixture. Next check the breakers. If this fails to solve the problem, you will then need to arrange for service.
- Translucent panels can be cleaned by removing them.
- First push up slightly above the grid system, then tilt and lower.
- Wash in a 1-2% solution of water and mild detergent. Do not rinse; the soap film will reduce static electricity.
DO NOT hang a ceiling fan from an existing ceiling light box without
adding additional support to carry the extra weight. Moving light
fixtures to accommodate special changes is a homeowner responsibility.
It is recommended at licensed electrician be consulted.
Outlets and Switches
- Electrical outlets can be found in every room in your home.
- Do not exceed the capacity for which the outlets were designed.
- Devices that increase the capacity of electrical outlets and multiple extension cords can cause a fire and severe personal injury or death.
If any electrical outlet does not have power, there are two possible explanations:
- Some outlets are controlled by a wall switch. Plug an appliance into the outlet and turn on nearby wall switches to see if the problem is corrected. If you find that an outlet is controlled by a wall switch, you might point this out to others who live inyour home.
- Check the circuit breaker. If the circuit breaker has been tripped, reset it and try the outlet again.Check the GFCI devices and reset if necessary. If the circuit breaker trips repeatedly, call a licensed electrician or your builder if your home is still covered under your third party warranty policy.
CAUTION: Small children can be injured by poking small metal objects into wall outlets. You can prevent this by installing child proof devices on all floor level electrical outlets. These devices are available in grocery stores and drug stores as well as home centres and hardware stores.
Smoke Detectors
- Smoke detector(s) have been installed in your home. The type of smoke detector, the installation procedure and the location(s) of the smoke detector(s) are selected to meet the requirements of local and provincial building codes. Do not move or disable the smoke detector.
- If you feel the need for additional protection, consider purchasing additional smoke detectors to be installed at additional locations.
- Clean smoke detectors at least once a month by gently vacuuming the outside of the unit using your vacuum’s soft brush attachment. Failure to do so will result in frequent, unwanted alarms. Test units after each cleaning.
- Batteries should be replaced twice a year and when the low battery alarm is audible.
Heating & Ventilation
Air Conditioning System
Your home is equipped with an air conditioning system. Please read the instructions and become familiar with the air conditioning system before you use them.
It is best not to overheat a new home during the initial year of occupancy because this may cause excessive shrinking of framing lumber and other materials. Begin with as little heat as possible and increase it gradually. Attempt to maintain a comfortable temperature between 20 and 22 degrees Celsius.
Carefully read and follow your manufacturers’ warranties and instructions for use and care of your air conditioning systems.
Q: How do I get maximum usage from my air conditioning system?
- Return air grilles allow for air to circulate back to theair conditioning system. Be sure not to cover the return air grilles with pictures, furniture, or other objects that might block the flow of air.
- The air conditioning condensation discharge point and the water heater pressure relief discharge points should be checked every three months to assure that they are clear. It is the homeowner’s responsibility to keep these areas open so discharge points are free of obstructions.
- Your home air conditioning is a closed system, which means that the interior air is continually recycled and cooled until the desired air temperature is reached. Warm outside air disrupts the system and makes cooling impossible. Therefore, you must keep all windows closed when operating the air conditioning system. The heat from the sun shining through windows with open drapes is intense enough to overcome the cooling effect of the air conditioning unit. Drapes must
be closed on sunny days. - Unlike a light bulb which reacts instantly when you turn on a switch, the air conditioning unit only begins a process when you set the thermostat. For example, should you come home at 5:30 P.M. on a day when the temperature has reached 32 degrees Celsius, and then set your thermostat to 20 degrees Celsius, the air conditioning unit will begin cooling, but will take much longer to reach the desired temperature. During the whole day the sun has been heating not only the air in the home, but the walls, carpet, and furniture. At 5:30 P.M. the air conditioning unit starts cooling the air, but the walls, carpet, and furniture release heat and nullify this cooling. By the time the air conditioning unit has cooled the walls, carpet, and furniture, you may well have lost patience. If evening cooling is the primary goal, you should set the air conditioning unit at a moderate temperature in the morning while the home is cooler, allowing the unit to maintain the cooler temperature through the day. This temperature setting
may then be lowered slightly further when you arrive home, with better results. Setting the thermostat at 10 degrees will NOT cool the home any faster and can result in the unit “freezing up” and not performing at all. Extended use under these conditions can damage the unit. - A common cause of air conditioning trouble is turning it off at the thermostat, and then turning it back on a short time later. This can cause an overload of the compressor motor which in turn can trip the breaker or blow the fuse and may shorten the life expectancy of the unit.
- The air conditioner compressor must be maintained in a level position at the original location. The compressor should not be enclosed. It is important to keep the area around the outdoor air conditioning unit clear of plants, grass, landscaping and/or debris. If good air flow is not available, the system will not function properly and damage to the mechanism can result.
If you find yourself with no air conditioning, the following checklist may help identify the cause. You should also review the manufacturers’ literature for additional hints.
- Thermostat temperature setting & switches.
- The ON/OFF switch to the outlet supplying the air conditioner.
- ON/OFF switch on air conditioner itself, if any.
- The fuse, if your air conditioner has one.
- Breaker on the electrical panel.
- Safety switch for the fan cover.
Exhaust Fans
- The exhaust fans provided in your home are designed to reduce odours, smoke, and moisture produced by cooking and bathing.
- Ensure that bathroom fans are turned on while showering or bathing and left on until all excess moisture has dissipated. Regular cleaning and inspection quarterly (more frequently if required by heavy usage) will help keep them in working order. After cleaning is completed, lubricate the fan with a light household oil (and wipe up any excess oil from the surface).
- Your wall timer operates the bathroom fan(s) in your home and are installed according to building code. It is very important that they be run as instructed by your builder.
Fan Coils
- Dirt and dust should not be allowed to accumulate on the units.
- The wheel, housing, and coils may be cleaned periodically using a vacuum cleaner. A stiff brush may be used to help remove dirt. When cleaning, take care not to dislodge the balancing weights on the wheel blades.
- Check the drain during the cooling season to ensure it is not clogged or growing algae.
- If your unit has a throwaway filter, it should be replaced regularly.
Fireplace
- The fireplace and venting system should be inspected annually by a qualified service person.
- Yearly inspections and service of your fireplace by a qualified fireplace company will ensure your fireplace system is maintained in proper working order.
The fireplace area must be kept clear and free of combustible materials, gasoline or other flammable vapours and liquids.
Please consult the manufacturer’s operating manual found in your homeowner portal for specific maintenance and care instructions.
Range Hood
- Grease build-up in your range hood can present a fire hazard. Avoid this problem by cleaning both hood and filters at least once every three months (more frequently if required by heavy usage) with mild dishwashing detergent, drying thoroughly and reinstalling new filters.
Thermostat
- The temperature in your home is controlled by a thermostat. In some cases, multiple systems may be installed, each with its own thermostat.
- Do not place a lamp or heat-producing appliance next to a thermostat, because heat generated by such an object may produce an incorrect reading.
Follow the manufacturer’s manual for operation and care instructions.
Interior Finishes
Backsplash and Wall Tiles
Regular maintenance of your tile backsplash will keep it looking good:
- Sealing the grout between your tiles once a year or so will prevent stubborn stains from penetrating the grout and becoming unsightly.
- Routine scrubbing of the grout with warm soapy water will keep it clean and fresh.
- Strong cleaners such as Lysol can stain the grout. Sealers and cleaners can be found at your local hardware store.
Cabinets
To maintain the beauty and utility of your cabinets, proper care is required:
- Remove splashes and splatters promptly to avoid permanent stains.
- The beauty of the wood can be preserved by polishing with a furniture polish. Laminated cabinets require little care but can be protected with a light coating of suitable wax.
- Do not wash laminated cabinets with water or water-based cleaners.
- The wood in your cabinets is a natural product. Some fading of the original colour will occur.
- Minor scratches can be covered with a putty stick that matches the finish of your cabinets. Putty sticks can be purchased at paint or hardware stores. Do not use abrasives on the finish of your cabinets.
- Direct sunlight can cause fading of the original colour. Consider using window coverings to prevent direct sun on cabinets.
- Excessive heat and moisture from other appliances (e.g. countertop ovens, water kettles, etc.) can also cause damage to the finishing and door. Avoid placing these items directly under a cabinet.
- The hinges on your cabinet doors can be lubricated, if necessary, with an oil-based lubricant. Apply a very small drop of oil to the top of the hinge and work the door back and forth several times so the oil will penetrate into the hinge. Wipe the excess oil with a dry paper towel.
Countertops
The countertops in your home are constructed of granite, marble, or quartz. To maintain your countertops, follow these general care instructions:
- Always use a cutting board to protect your counter tops when you prepare food. While minor scratches that can result from cutting food may not be noticeable at first, in time they will dull and mar the lustre of the finish. This can happen to even the hardest ceramic tile.
- Wipe up spills immediately. Some liquids, particularly hot ones, can cause almost imperceptible stains on ceramic tile grout, plastic laminate and cultured marble. In time, the stains can accumulate and become unsightly.
- Be careful to avoid dropping pots and pans and other kitchen items on your counter tops. This can break or chip the counter’s surface. Be aware of placing extremely hot pans on the counter.
- Re-caulk separations that occur around sinks and along the backsplash of countertops before water can enter into those separations and cause damage.
Granite
- Granite is a natural stone product, and natural characteristics might be visible throughout the slab. These include: variations in colour and pattern, tiny hairline crevices (cracks), small pits, blemishes, or dull spots. These elements were created during rock formation and are not flaws or defects. They will not impair the function or durability of the material.
- Re-seal granite counters every 2-3 years to achieve maximum protection.
- Use cutting boards to avoid scratches.
- Remove spills immediately to avoid stains.
- Most food and drinks are acidic and can etch the finish on the stone.
- Clean counters with mild dish soap and water.
- Do not use abrasive or bleach/ammonia based cleaners or scouring pads (Windex, Lysol Wipes, lemon juice, oils, vinegar etc).
Quartz
- Quartz is 90-93% natural materials with the finest quartz and resins. Through extensive engineering, a manufacturing process was developed using intense heat and pressure to increase the colour consistency, stain resistance and overall strength of this product. However, natural variation may be visible throughout the slab.
- Quartz countertops are maintenance free so they do not require sealing. Doing so will void any supplier warranty. Magic eraser pads can be used on quartz to remove some metal marks from pots and pans.
- Use cutting boards to avoid scratches.
- Remove spills immediately to avoid stains.
- Most food and drinks are acidic and can etch the finish on the stone.
- Clean counters with a soft cloth to maintain shine, and mild dish soap and water.
- Do not use harsh chemicals to clean quartz. Scouring pads should never be used – they can damage the surface of your countertop.
Flooring
The flooring in your home requires routine maintenance and care.
- In some instances, the floors may squeak. Squeaky floors are usually caused by a change in the weather, or by normal shrinkage of the wood materials and/or settlement of your home. This is normal in new home construction and is not considered a construction defect.
- The subfloors of your home have generally been designed to support the weight of your home, plus a per square foot furniture and occupancy load. Waterbeds, pianos, and pool tables may exceed this limit. Check with your builder if you are in doubt.
Please follow your manufacturer’s recommendations.
- The doors and door frames in your home are typically made of painted or varnished wood.
- Wooden doors are subject to expansion and contraction with changes in heat and humidity. The result can be warping and sticking. This is normal and may correct itself as conditions change. You should allow your home to go through at least one dry and damp season before you make other permanent changes. You can correct most sticking doors by the careful removal of small amounts of wood. Usually, this can be done with sandpaper.
- In most cases, it is not necessary to remove the door. Use sandpaper to lightly sand the door to remove a small amount of wood at a time until the door no longer sticks.
- Use touch up paint on the exposed wood promptly.
- Small cracks may also develop during a dry season and may disappear during wet winter months. If the cracks do not disappear over time, they can be easily filled with wood putty, caulking compound or filler. These materials may be obtained at your local hardware store or home centre.
- Avoid slamming doors because damage may result.
- Do not make hasty adjustments on new doors, since the condensation and humidity of a new home will affect them only temporarily.
- Occasional slight sticking is normal and even desirable for a weather-tight fit. To eliminate minor sticking, try paraffin, candle wax or commercial dry lubricant sticks.
- If occasional lock sticking occurs, exterior locks can be easily freed with lubricant sold in most hardware stores.
- Locks may require adjustments of the strike plate on the door jamb. Remove the strike plate and carefully file the latch opening. Or move the strike plate by moving the screws into new positions.
- The hinges and locks on your doors may require lubrication from time to time for proper maintenance and to prevent squeaks. Remove the hinge pin and rub it with a light coating of Vaseline or another petroleum jelly (we do not recommend using oil because it accumulates dust), replace the pin (and wipe off any excess), and then swing the door back and forth a few times.
- Doorknobs that are used frequently can become loose. As soon as you notice such a condition, tighten any screws on the doorknob that are loose.
- The shrinkage of insert panels in doors, showing raw wood edges is not uncommon due to temperature and humidity changes and can be corrected by repainting after the movement has stabilized.
Carpet
- Vacuum carpet frequently to avoid the buildup of dirt and grime. High traffic areas should be vacuumed twice a week. If your vacuum cleaner has a beater type attachment, the beater should barely touch the tops of the carpet fibres.
- Eliminate carpet shedding fibres as they appear. Loose carpet fibres will work their way to the surface for quite some time. This is known as fluffing or shedding. Vacuum these fibres as a part of your routine cleaning.
- If a tuft of carpet appears which is longer than the surrounding carpet, do not try to pull it out. It is probably attached to the backing and simply needs to be trimmed to the height of the surrounding tufts.
- Visible carpet seams may be evident and are not an indication of a fault in the carpet. Most rolls of carpet are produced in 12 foot widths. This dictates that most of your rooms will have at least one seam. Professional installers will attempt to install your carpet with the minimal amount of seams and without excessive waste.
- Seams are most visible in a home before it has been furnished and occupied. As your carpet wears, the fibres will blend together, eliminating many of the visible seams.
- When moving furniture, lift rather than drag the pieces over carpeting, to avoid lumps and snags. Doormats are an excellent way to save your carpets. Use them in high traffic areas with one on each side of exterior doorways.
- Remove spills immediately. Stain removal is easier if it is done promptly. Consult your specific manufacturer’s warranty information for stain removal. Cleaning products should be tested on a section of carpeting that is not in a high traffic area. Do not use cleaners that have not been recommended by the manufacturer for the carpeting materials in your home.
- You may void your manufacturer’s warranty using cleaners that have not been recommended by the manufacturer.
- Thoroughly clean your carpets at least once each year. While do-it-yourself carpet shampoo devices can be effective, consider employing a professional carpet cleaner.
- Refer to the manufacturer’s recommendations on carpet care for additional information.
- Regular vacuuming and immediate treatment of stains will prolong the beauty and life of your carpeting.
Hardwood
- Wood floors will respond noticeably to changes in humidity level in the home, especially in the winter.
- When a floor is new, small splinters of wood may appear; dimples or scratches can be caused by moving furniture, dropping heavy or sharp objects, etc. Bubbles, scratches, and/or minor dirt and debris appearing in the finish of a wood floor are typical and within normal construction standards; comparison to the finishes in the project models is the standard used for such typical imperfections.
- Some shrinkage or warping can be expected, especially around heat vents or any heat producing appliances.
- Warping may occur if the floor becomes wet repeatedly or is thoroughly soaked even one time.
- A dulling of the finish in heavy traffic areas is likely; a white, filmy appearance is caused by moisture (often from wet shoes or boots).
- Colour variations may develop from exposure to direct sunlight.
- Plank flooring will sometimes be adversely affected by moisture when installed over concrete and may pop due to slight variations in the surface of the concrete slab.
Q. How do I care for my hardwood flooring?
- Clean your wood floors frequently. Sweep the floors and mop with a soft, dry mop or cloth. Vacuum regularly, when you vacuum household carpets.
- Do not use water or water-based cleaners, bleach or one-step floor cleaners.
- Do not flood wood floors with water. This will cause stains, warping and the destruction of the flooring.
- Do not permit water or other liquids to stand on wood flooring. Wipe up spills immediately.
- Exposures to direct sunlight can cause damage, discolouration or fading to wood floors. Use window coverings in these areas.
- Use protective walk-off mats at the exterior doors to help prevent sand and grit from getting on the floor. Gritty sand is one of wood flooring’s worst enemies.
- Do not drag heavy appliances or furniture across wood flooring. Permanent scratches in the finish can result. Ladies’ high-heeled shoes can dent wood flooring.
- Install proper floor protectors on furniture used on wood floors. Protectors will allow chairs to move easily over the floor while minimizing scuffing. Clean the protectors on a regular basis to remove any grit that may accumulate.
Interior Paint
The paint on exterior and interior wood surfaces must be maintained in good condition at all times.
- Chips, scratches and other breaks in the surface of the paint must be repainted promptly, or serious damage to the underlying wood could result.
- Please be aware that all paint is subject to yellowing and discolouration. The action of the sun usually minimizes yellowing on exterior surfaces. However, yellowing can be noticeable on interior surfaces. Yellowing is caused by the natural drying and aging of the paint and by exposure to certain chemicals such as ammonia fumes and others that are found in some household cleaners.
- Light colours and white painted surfaces are more subject to yellowing than darker colours.
- Yellowing of oil-based paints is unavoidable. Because yellowing tends to take place over time and relatively evenly on given surfaces, it may not be noticeable until you use touch up paint.
- Interior woodwork, as well as the bathrooms and kitchen walls, are generally painted with a latex paint. These areas may be wiped down with a soft sponge and soapy water.
- Painted interior walls are not “scrub-proof”. Scrubbing or harsh cleaners will remove paint. Also, you should avoid washing newly painted interior surfaces for at least three months after you move into your home or after re-painting, to allow the paint to fully set.
- When doing paint touch-ups, use a small brush, applying paint only to the spot needing attention. Filler may be used to cover any small defects prior to paint touch up. Touch-ups will sometimes be visible.
- When it is time to repaint a room, prepare the wall surfaces first by cleaning with a mild soap and water mixture or a reliable cleaning product.
- Always dispose of paint and other hazardous materials properly.
Trim
- Shrinkage of wood trim occurs during the first two years or longer depending on the temperature and humidity both outside and inside your home.
- Wood is more prone to shrinkage during the heating season.
- Maintain a moderate and stable temperature and humidity level to help minimize the effects of shrinkage.
Plumbing
- We recommend that you become familiar with your plumbing system as soon as you move in.
- You should know the location of the main shut-off and individual shut-offs in all the bathrooms and the kitchen. In the event of a plumbing emergency, you must close the main water shut-off for the home at once.
- Flowing water can cause severe damage to your home and its contents.
- Please make certain that everyone in your household knows the locations of the main shut-off valves in your home.
- Other water shut-offs may be located under the sinks in the bathrooms and the kitchen, or behind the toilet bowl.
- Another water shut-off may be located on the top of the water heater. This controls the flow of water to the water heater and should be closed in the event of a leak in the water heater. You and others in your home should know where these water shut- offs are and how they work.
- Each plumbing fixture in your home has a drain pipe specially designed to provide a water vapour barrier between your home and the sewer. The drain pipe or trap is the U-shaped area of pipe directly under the sink. The trap holds water which prevents the airborne bacteria and odour of sewer gas from entering your home.
- If any of your faucets are used infrequently, we suggest that they be turned on occasionally to replace the water in the trap lost to evaporation. Because of their shape, the traps are the most likely area to become clogged.
- Periodically check under kitchen and bathroom cabinets for leaks.
- If you detect the odour of sewer gas from a sink after you have ensured there is water in the sink trap, contact a licensed plumbing contractor.
SAFETY TIP: It is possible to be accidentally locked into the bathroom. Keep the door key in a safe open place outside the bath, but nearby. If you lose it, a small screwdriver, ice pick, or similar tool can be used.
Bathtubs, Showers, and Surround Enclosures
- Fibreglass or acrylics are lightweight materials which add beauty and style to bathroom tubs and showers.
- Although porcelain is durable, be careful not to drop heavy articles on it that can cause chipping. Should scratching or chipping occur, contact a porcelain repair business.
Q. What is the best way to clean my bathtub and shower?
- You can preserve the original high gloss finish by regular cleaning with a liquid cleaner, detergent or foaming cleanser.
- Do not use abrasive cleansers. Alcohol used as a cleaning agent may cause discolouration.
- Stubborn stains can be removed with various appropriate household cleaning agents used with a nylon-scouring pad. Never use metal scrapers or similar tools. Always rinse the walls and the door of the shower after each use.
- The delicate beauty and gloss of porcelain bathtubs are easily maintained by observing a basic rule: never use abrasive cleaners. They scratch through the glasslike surfaces quickly. Liquid dishwashing detergent on a moist cloth is preferred.
- If your bathtub is jetted, follow the manufacturer’s instructions for operation, care and cleaning.
Clogged Drains
- Clogged traps can usually be cleared with a plumber’s helper (plunger). If you use chemical agents, follow directions carefully to avoid injury or damage to the fixtures or personal injury.
- Clean a plunger drain stopper, usually found in bathroom sinks, by loosening the nut under the sink at the back, pull out the rod attached to the plunger and lift the stopper out.
- Clean and return the mechanism to its original position.
Fixtures
- Plumbing fixtures with special finishes are susceptible to damage and staining if water is permitted to stand on the surfaces and by the use of an abrasive cleansing product.
- Most of the plumbing fixtures in your new home are plated with finishes that are resistant to water corrosion. The plating materials forming these finishes are, however, relatively soft, and can be damaged with abrasive cleansers, scouring pads and tools or intense sunlight.
- Clean the fixtures with warm soapy water and a soft sponge or cloth. Rinse with clear water and wipe dry to prevent spotting and soap buildup.
- If water is permitted to accumulate and stand at the base of the fixtures, corrosion and tarnishing can result.
- Always wipe the area dry.
- Hard water can spot and damage bright chromed plumbing fixtures. While this is not entirely preventable, you can minimize the staining and discolouration by drying the fixtures after each use.
- Avoid using excessive force when you turn your faucets on and off. The seals in the faucets can be damaged by such abuse in a short time.
- Faucets that are equipped with aerators will mix air with the stream of water to prevent splashing. They need to be cleaned occasionally to remove a buildup of mineral deposits. When you notice that the stream of water has lessened, unscrew the aerator from the mouth of the faucet. Remove the debris and rinse the washers and screens. Replace the parts in their original order and screw the aerator onto the faucet. Perform this homeowner maintenance as needed, usually every few months.
Shower Doors
- Always rinse the walls and door of the shower after each use.
- Inspect every six months, or at any sign of leakage, for proper fit and for deterioration of the rubber “sweep” at the bottom of the door.
- Adjust the door and replace the sweep if necessary. At the same time, inspect the caulking, and re-caulk where any separations appear.
Sinks
Regular cleaning is important to maintain the appearance of your sink:
- Clean sinks with a soft cloth, mild detergent and water. Rinse and dry properly to eliminate any film build up and water spotting.
- Do not use abrasive, metal or scouring pads. They will take away from the finish.
Toilets
- Most toilets are made of vitreous china, a glasslike material that is highly resistant to staining.
- Clean your toilets with a toilet bowl cleaner and a brush or cloth.
- Vitreous china is brittle and will easily break or shatter if hit with a hard object.
- Water conservation regulations have mandated the use of low flow or water-saving toilets in new homes. These toilets use less water so they are important elements in the area’s water conservation program. However, at times you may notice an incomplete flush. When this happens, allow the tank to refill, and then repeat the flush. Feminine products, diapers and baby wipes must not be flushed in toilets.
- Always keep a plumber’s plunger on hand to use in the event of a stoppage of a toilet.
- If a stoppage occurs, close the shut-off valve on the back side of the toilet. Usually, a few vigorous pumps with the plunger will free the obstruction.
- Stoppages that are not construction related are the responsibility of the homeowner. If you are unable to clear the obstruction yourself, we suggest that you call a licensed plumbing contractor.
- Most blockages in plumbing drains, including toilet drains, are progressive – they begin slowly and get worse over time until the drain is completely blocked. Use a plunger at the first sign of a slow drain. This simple step can prevent most serious drain blockages.
- Do not use drain cleaners for toilets. The harsh chemicals in drain cleaners can damage the toilet seals and cause a leak.
- If the flush valve fails or begins to leak, you can purchase a new flush valve at a home centre or hardware store. If you are not entirely comfortable with this do-it-yourself project, a licensed plumbing contractor can perform this task.
Water Conservation
In the home, water conservation saves both water and energy, since energy is needed to heat water and run appliances.
Please consider the following water conservation tips:
- Every time a toilet is flushed, about 6 litres of water goes into the sewer. Do not use the toilet for things that should go into the wastebasket.
- A partially full tub uses far less water than a long shower, while a short shower uses less than a full tub (35 to 55 litres.
- Rinse your dishes and always load your dishwasher to capacity before turning it on. Most models use between 30 to 50 litres per run.
- Repair all faucet leaks promptly to avoid letting valuable water run down the drain. Just a slow drip can add up to 30 to 40 litres a day. Turn off the water while brushing your teeth or shaving to avoid wasting more water.
Water Lines
- Plumbing systems should be maintained by running water through each faucet for approximately one minute each month, to minimize stagnation.
- In the event of water leaks, shut off the main water supply to the home. The shut-off is typically located in your home (often under the sink or at the supply line to the particular fixture), or else utilize the main home shut-off.
- The location of the shut-off valves will be pointed out to you during your orientation walk through.
- Individual shut-offs are located adjacent to the kitchen and bathroom sinks, the water heater, the washer outlet and the toilets. Use these shut-offs for local leaks.
Structure
Caulking
- Caulking is the method in which sealant compounds are generally applied to seal gaps between adjacent surfaces.
- Over time, and particularly during warm, dry weather, caulking will dry and shrink. When this happens, it no longer provides a good seal against moisture.
- As part of your routine maintenance, you should inspect the caulking around your windows, doors, sinks, showers, tubs, countertops, and ceramic tile, and should make any necessary repairs to the caulking every six (6) months or as needed.
- Caulking guns and applicator tubes, disposable caulking guns, and caulking compounds are available at hardware stores and home centres.
Ceilings
- The ceilings in your home require occasional cleaning and periodic painting.
- Remove dust or cobwebs as part of your routine cleaning. When needed and as a part of your regular maintenance, you may want to repaint your ceiling.
- If your ceiling consists of luminous light fixtures, you should follow these tips. Do not use cleaning solvents or other strong chemicals on the plastic panels or aluminum grid.
- We recommend that you wash the panels in a mild solution of dish-washing liquid and water. Use a soft cloth to wipe the grids using only warm water. Towel-dry the panels and grids to remove any soap residue and water spotting.
Condensation
- Condensation is normal in a new home because many litres of water were used in its construction. This water causes higher than normal humidity until the drying process is complete.
- When condensation appears on a cool pipe or on glass surfaces, it may give the false impression that you have leaks.
- Excessive condensation or sweating on cool surfaces can be eliminated by making sure attic louvers and crawl spaces are clear of debris. Open windows can aid the home drying process, but it takes time. Avoid speeding up the process by using excessive heat. You should use a constant thermostat temperature.
Drywall
- Slight cracking, nail pops or seam joints may appear in walls and ceilings. Theseare caused by the shrinkage of the wood and normal deflection of wall studs,trusses or rafters to which the drywall is attached.
Effects of Weather and Temperature
- Natural building materials such as wood and concrete are subjected to constant expansion and contraction from day to day.
- Temperature variations, which can be extreme, can result in warping of wood materials and cracking of drywall, stucco, concrete and mortar. These effects are particularly obvious in the first two years after a home has been built.
- You can minimize these effects by maintaining a constant temperature in your home during the first two years. This allows the wood to dry at an even rate and may eliminate larger settlement cracks.
- Minor cracks and displacement of wood are a normal part of the aging process of your home and do not affect its structural integrity.
- Freezing weather can cause numerous problems in a home.
- Freezing ground can raise and crack concrete and landscape improvements, which will move again after the ground thaws. You should take care to properly “winterize” your home’s exterior and garage areas, including water lines, irrigation lines, etc.
Expansion and Contraction
- All building materials are subject to expansion and contraction caused by changes in temperature and humidity. This applies to everything in your home, even including the concrete.
- Dissimilar materials expand or contract at different rates. This results in separation between materials, particularly dissimilar ones.
- The effects of this expansion and contraction can be seen in such things as small cracks in the foundation, drywall, paint-especially where moldings meet sheetrock, and mitered corners, where tile grout meets tub or sink, etc.
- This can be alarming to an uninformed homeowner, but, in fact, it is very normal, even in the highest quality of construction. This may occur in your home. It will be most noticeable during the first year, but typically continues into subsequent years.
- In most cases, caulking and paint is all that is needed to repair this minor evidence of a very natural phenomenon. Even properly installed caulking will shrink and must be maintained.
Interior Walls
- The walls in your home are constructed of wood and other materials, which are subject to normal expansion and contraction.
- Molding and trim can shrink and warp in some cases.
- Routine maintenance on molding, trim and wall boards is the responsibility of the homeowner beyond your warranty coverage. Replace warped molding and trim.
- Some slight cracking, nail “pops” and/or seams may become visible in plaster, gypsum wallboard, drywall or sheetrock walls and ceilings.
- These occurrences are caused by the shrinkage of the wood and normal deflection of rafters to which the sheetrock is attached, are considered normal, and are a maintenance responsibility of the homeowner.
- They can be repaired by filling with filling compound, smoothing with fine sandpaper, and then painting the entire surface.
- Popped nails do not alter the strength of the wall and should be left alone until time to repaint.
- Use care when you hang pictures and other decorative items. The wall board will be damaged if it is hit with a hammer.
- Costly repairs can be avoided by using picture hooks and other supplies from a home centre or hardware store.
- Always repair nail holes with a dab of filler.
- The walls in your home may be textured. The texturing material is relatively soft and can be damaged by scrubbing with abrasive cleansers and rough brushes or cloths.
- The pattern in textured walls can vary and is difficult to duplicate when repairs are made.
- Small finger smudges may be removed from the enameled walls with a solution of warm water and a mild detergent soap. Wash gently with a soft sponge or cloth. Rinse and wipe off the excess water carefully.
- Do not permit the wall board to become soaked with water. Larger spots, not easily removed by cleaning, will require paint touch up.
Mold
- Mold can be found almost everywhere. Molds are microscopic organisms that are part of the fungi family, and are an essential part of the world’s ecological system.
- Outdoors, many molds live in soil and are key to the natural breakdown and recycling of organic material, such as leaves, wood and plant debris.
- Lumber used in the construction of homes typically contains some level of molds, fungi, and/or spores. Because it may be impossible or impracticable to eliminate all indoor mold, indoor mold is an important topic about which a homeowner should become informed.
- Mold spores are airborne and travel in and out of buildings as air is exchanged and with the movement of people and their belongings.
- When excessive moisture or water accumulation occurs indoors, mold growth will likely occur, especially if the moisture problem is not discovered.
- There is no practical method to eliminate all molds and mold spores in an indoor environment.
- The primary method to control indoor mold growth is to control moisture. The best course of action for any homeowner is to keep the indoor environment as “clean and dry” and free from dust and dirt as reasonably possible.
Limiting Mold Growth
- Practical approaches to limiting mold growth are early detection and prompt resolutionof excessive moisture.
- If you can see mold or detect an earthy or musty odour, you can assume you have amoisture problem.
- Any moisture problem must be solved in order to arrest and eliminate mold growth.
- Part of the control of the indoor environment is controlling air moisture. Watch for water condensation on interior surfaces such as walls, windows and areas near air conditioning registers.
- Uses that have the potential of increasing relative air humidity are such things as habitation, bathing, cooking, plants, washing, and humidifiers, especially if not vented.
- Other moisture sources, which sometimes can go unnoticed, are water leaks from pipes in walls, and rainwater leakage through windows and roofs.
- Controlling air moisture is the most important action in controlling mold growth. Therefore, keep drip pans from refrigerators and air conditioners clean and dry; use exhaust fans or open windows when cooking, washing, drying clothes, and bathing. Irrigation system timers should be adjusted to reflect seasonal weather changes.
- Report or fix water leaks promptly – Any indication of water leaks or resulting mold at roofs, windows, floors, carpets, etc., should be reported immediately.
- Every homeowner must take all appropriate steps to prevent conditions that may cause mold or mildew to develop in your home.
Mold Prevention Obligations
- To keep the home free of dirt and debris that can harbour mold
(dirt/dust/animal hair and dander are all very efficient hosts for mold) - To regularly clean and sanitize, windows, bathrooms, kitchens, and other home surfaces where water, moisture condensation, mildew and mold can collect
- To use dry towels or bath mats when stepping out of shower or tub
- To use bathroom fans while showering or bathing;
- To use exhaust fans whenever cooking, dishwashing or cleaning. If no fan exists, open a window to allow proper ventilation and moisture to escape;
- To maintain regular air flow and circulation throughout the home
- To use all reasonable care to close all windows and other openings in the home to prevent outdoor water from penetrating into the interior home (i.e. rain, irrigation water, etc.)
- To clean and dry any visible moisture on windows, walls, ceilings, floors and other surfaces including personal property, as soon as reasonably possible (note: mold can grow on damp surfaces within 24 to 48 hours)
- To limit the indoor watering of houseplants (total number of plants indoors is also an important variable)
- Do not hang wet clothing on indoor drying line;
- Properly maintain your dryer vent exhaust line (clean/remove lint at least once a year or sooner as may be needed)
- To maintain caulking around tubs, showers, toilets, sinks and other interior water receptacles at least once a year and more frequently if needed
- To maintain caulking around windows, doors and other exterior openings at least once a year and more frequently if needed.
- To maintain window tracks and weep holes at least once a year and more frequently if needed (keep tracks and weep holes clean of debris/dust to allow proper egress of water when rain or irrigated water gets in them)
- To maintain positive drainage and grading away from the foundation and walls of the home
- To maintain gutters and downspouts in a clean and operable condition at least once a year and more frequently if needed
- To prevent penetrations of exterior surfaces (i.e., stucco, siding, brick) and roof of home from post construction additions (i.e., trellises, patio covers, awnings, satellite dishes, etc.)
- To maintain and not obstruct fresh air supply to furnace, air conditioner or heater
- To maintain and not obstruct air conditioning primary and secondary
condensate lines - To maintain and not obstruct ventilation installed by the builder in attic, basements, crawl spaces or other locations in the home
- To prevent irrigation systems from exposing exterior surfaces of the home to water or over\ saturating/flooding ground/soil near and around foundation of the home
- To properly use and maintain appliances containing water and other liquids
- To not alter insulation installed by builder
- To prevent clogging of plumbing.
Seasonal Maintenance Checklist


REGULAR MAINTENANCE IS THE KEY
Inspecting your home on a regular basis and following good maintenance practices are the best way to protect your investment in your home. Whether you take care of a few tasks at a time or several all at once, it is important to get into the habit of doing them.
Establish a routine for yourself, and you will find the work is easy to accomplish and not very time-consuming. A regular schedule of seasonal maintenance can put a stop to the most common — and costly — problems, before they occur. If necessary, use a camera to take pictures of anything you might want to share with an expert for advice or to monitor or remind you of a situation later.
This checklist is intended to provide you with a list of common maintenance tasks that most homeowners are required to perform but is not intended to be a comprehensive list.
Some items may not apply to your home, and some required maintenance may not appear on this checklist. For complete information on the maintenance you are required to perform on your home, please consult all manuals, warranties, and documentation provided to you by your builder, in your homeowner portal and on the manufacturer’s web sites.
If you do not feel comfortable performing some of the home maintenance tasks listed below, or do not have the necessary equipment, for example a ladder, you may want to consider hiring a qualified handy person or licensed contractor to help you.
Winter
- Check and clean or replace furnace air filters each month during the heating season. Ventilation system, such as heat recovery ventilators, filters should be checked every two months.
- After consulting with your hot water tank owner’s manual, drain off a dishpan full of water from the clean-out valve at the bottom of your hot water tank to control sediments and maintain efficiency.
- Clean humidifier two to three times during the winter season.
- Vacuum bathroom fan grille.
- Vacuum fire and smoke detectors, as dust or spider webs can impede them from functioning.
- Vacuum radiator grilles on back of refrigerators and freezers, as well as empty and clean drip trays.
- Check gauge on all fire extinguishers; recharge or replace if necessary.
- Check fire escape routes, door and window locks; and hardware and lighting around outside of house. Ensure that your family has good security habits.
- Check all faucets for signs of dripping and change washers as needed. Faucets requiring frequent replacement of washers may need repair.
Spring
- Check all faucets for signs of dripping and change washers as needed. Faucets requiring frequent replacement of washers may be in need of repair.
- After consulting with your hot water tank owner’s manual, carefully test the temperature and pressure relief valve to ensure that it is not stuck. CAUTION: This test may release hot water that can cause burns.
- On a monthly basis during the heating season: check and clean, or replace, furnace air filters. The ventilation system, most notably, heat recovery ventilators and filters, should be checked every two months.
- Have fireplace, wood stove and chimney cleaned and serviced as needed.
- Shut down and clean furnace humidifier. Moreover, close the furnace humidifier damper on units with central air conditioning.
- Check air conditioning system and have it serviced every two to three years.
- Clean or replace air conditioning filter (if applicable).
- Check dehumidifier and clean if necessary.
- Turn off gas furnace and fireplace pilot lights where possible.
- Have well water tested for quality. It is recommended that you test for bacteria every six months.
- Check smoke, carbon monoxide and security alarms. If needed, replace the batteries.
- Clean windows, screens and hardware. Replace storm windows with screens.
- Check screens first and repair or replace if needed.
- Open valve to outside hose connection after all danger of frost has passed.
Summer
- Monitor basement humidity and avoid relative humidity levels above 60 per cent. Use a dehumidifier to maintain safe relative humidity. Clean or replace air conditioning filter, and wash/replace ventilation system filters if necessary.
- Inspect basement pipes for condensation or dripping and take corrective action. For example, reduce humidity and insulate cold water pipes.
- Check the basement floor drain to ensure the trap contains water. Refill with water if appropriate.
- If you have a plumbing fixture that is not used frequently—for example, a laundry tub or spare bathroom sink, tub or shower stall—then run some water briefly to keep water in the trap.
- Give all carpets and rugs a deep clean.
- Vacuum bathroom fan grille.
- Check security and stability of all guardrails and handrails.
- Check functionality of all windows and lubricate as required.
- Lubricate garage door hardware and ensure it is operating properly.
- Lubricate automatic garage door opener motor, chain, etc. Furthermore, ensure that the auto-reverse mechanism is properly adjusted.
- Remove any plants that contact, or roots that penetrate, the siding/brick.
- Repair driveway and walkways as needed.
- Repair any damaged steps that present a safety problem.
Autumn
- Have furnace or heating system serviced by a qualified service company every two years for a gas furnace, and every year for an oil furnace.
- Open furnace humidifier damper on units with central air conditioning—in addition to cleaning humidifier.
- Lubricate circulating pump on hot water heating system.
- Bleed air from hot water radiators.
- Examine the forced air furnace fan belt for wear, looseness or noise; clean fan blades of any detritus (after disconnecting the electricity to the motor first).
- Turn on gas furnace pilot light.
- Check, clean or replace furnace air filters, monthly, during the heating season. Ventilation systems, such as heat recovery ventilators and filters should be checked every two months.
- Vacuum electric baseboard heaters to remove dust.
- Remove the grilles on forced air systems and vacuum inside the ducts.
- If the heat recovery ventilator has been shut off for the summer, clean the filters and the core, and pour water down the condensate drain to test it.
- Clean portable humidifier, if one is used.
- Have well water tested for quality. It is recommended that you test for bacteria every six months.
- Check sump pump and line to ensure functionality and to ascertain whether there are no line obstructions or visible leak
FREQUENTLY ASKED QUESTIONS
These are some of the most commonly asked questions our Service department receives. For more detailed and specific explanations please search the relevant section in the manual above.
Q: Should I report any deficiencies as I find them, or save them all for my 30-Day List?
A: Save all of them for your 30-Day List, and submit them through the TARION website: www.TARION.ca. It is important to submit all your deficiencies in writing, preferably by email, to ensure there is a paper trail and that none of your requests are overlooked.
Q: How do I submit deficiencies after my 30-Day List has passed?
A: Follow the example below, and email to [email protected]. Your request will be evaluated to see if the deficiency qualifies for warranty.
How to Format an Email for Deficiencies After 30-Day List
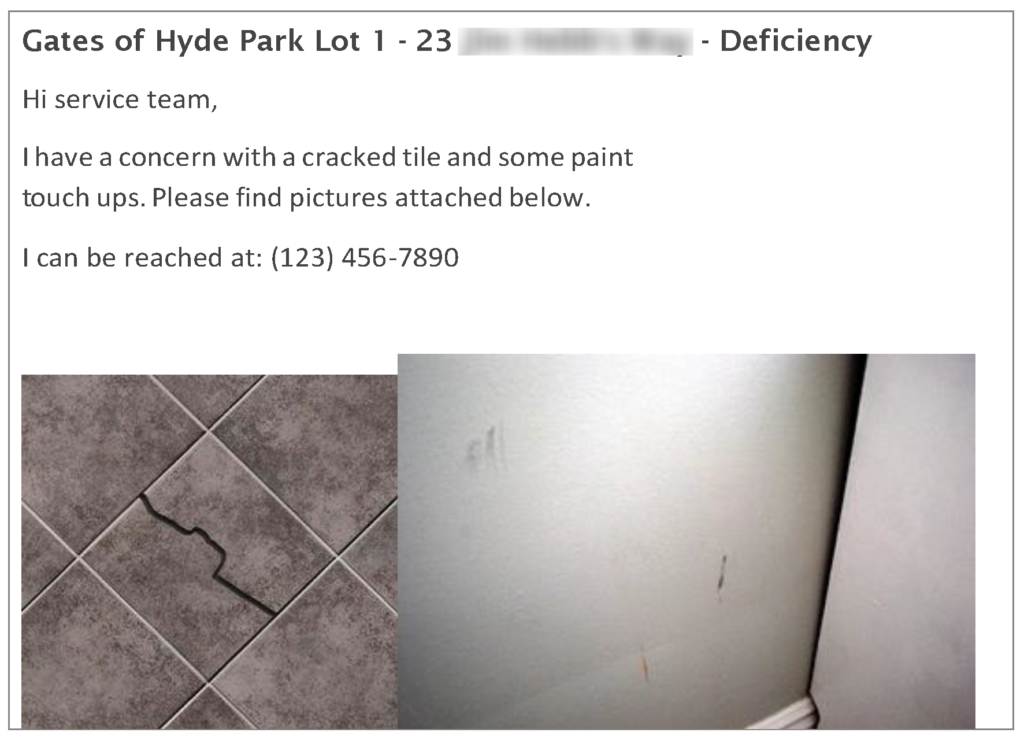
Q: How often should I change my furnace filters?
A: New furnaces: every month for the first year. Every 3 months after the first year. A plugged filter is often the main issue if the furnace will not start.
Q: How often should I change the HRV filters?
A: The HRV has two filters: a foam pre-filter and a rigid plastic core filter. Both the foam prefilter and the rigid core filter should be changed/washed every six months.
Q: What setting should I have the HRV on for normal use?
A: Normal use the HRV should be on the minimum setting. When away, the HRV should be on intermittent setting. To exchange air due to cooking odours or poor air quality, the HRV setting should be on maximum until that air quality is acceptable, at which point the setting should be returned to minimum.
Q: Is the HRV the same thing as a humidifier?
A: Not exactly. HRV means “Heat Recovery Ventilator” which is a machine which provides fresh air and improved climate control in your home while also saving energy by reducing heating requirements whereby a humidifier simply increases the humidity (moisture) in the home.
Q: Is it normal to have cracks in the basement floor?
A: Yes. It is normal for concrete to crack due to settlement. Homeowner should monitor and it is not a concern unless there is displacement (one side is clearly raised above the other).
Q: There are gaps in my hardwood floor. Is this normal?
A: Yes. Hardwood is a natural material and therefore susceptible to changes in humidity in the home. The small gaps allow for these natural changes of expansion and contraction.
Q: What is the best way to clean hardwood?
A: Sweep on a daily basis or as needed; never wet-mop a hardwood floor as any excessive water can cause wood to expand and possibly damage the floor. When damp mopping, remove all excess water from the mop.
Q: My granite countertop looks different from the one I chose at the décor centre, why is this?
A: Granite is a natural material and therefore no two pieces are alike. Two pieces cut from the same slab of granite may have different markings/vein patterns.
Q: Can I do anything about the amount of condensation on my windows?
A: Condensation is caused by excess humidity in the home. Lowering the humidity in your home will reduce the amount of condensation on your windows. Consider purchasing a dehumidifier to drastically lower the amount of condensation.
Q: How come the outlets and central vacuum in my home have no covers on them?
A: Foxwood Homes provides “rough-ins” for these receptacles prior to their installation – when the central vacuum and cable/phones are installed, the companies doing the respective installation will provide the covers.
Q: Where can I request some extra paint to do my own touch-ups at home?
A: Please feel to contact our Warranty Department during regular work hours by phone 519-902-5524, or email [email protected] to request touch-up paint.
Q: When will my grading and sodding be done?
A: Grading and sodding typically begins after the sidewalk and curbs have been completed in front of your lot, as we need the elevation of these items to complete the final grading to ensure proper drainage.
Q: How long do I have to wait before I can park on my driveway after installation?
A: We strongly recommend waiting at least 3 to 4 days after the asphalt has been laid, possibly longer if the weather is extremely hot.
Q: How much watering is necessary on new sod?
A: Sod should be watered heavily for the first several weeks (i.e. two hours a day in the morning or evening). This is especially important in very hot weather. NOTE: When watering, it is important the sod is sufficiently saturated.
Q: Where can I find more information about what is, and what is not, covered under the warranty?
A: Please refer to the TARION website: www.TARION.com for the most up-to-date and comprehensive information.